Container demo: OpenVPN L3 with NAT
This container demo shows how to run a OpenVPN L3 client with NAT in a container. The goal is:
connect an OpenVPN server with a given config file
NAT all traffic from the LAN interface through that OpenVPN server
Where to find the source OCI image
The source image this demo is based on can be found on dockerhub: dperson/openvpn-client
The final image this demo uses is: uwcloud/openvpn
It’s available for these platforms:
amd64
armhf
arm64
Step #1: Importing the image
The following mutation will import the image and:
dynamically assign a /24 for each container instance
versions increase automatically (if the version parameter is not passed in node_service_input)
mutation import_openvpn_l3 {
  DM_import_node_service(
    input: {
      customer_id: "102e88a2-86cf-4a2d-8712-99e8e652db48"
      node_service_input: {
        container_image: "openvpn-l3"
        name: "openvpn-l3"
        apikey_roles: []
        wipe_on_update: false
        environment_variables: [{key: "OTHER_ARGS", value: "--up /up.sh --down /down.sh"}]
        access_gpsd_enabled: false
        network_config: {
          lan_configure_network: dhcp
          access_interfaces: {
            name: "eth1"
            label: "lan"
          }
          access_provided_subnet: "10.190.0.1/16"
          dhcp_range_template: "10.190.0.1/24"
          dhcp_lease_time_seconds: 600
          wan_configure_network: allocated
          wan_dns_override: []
        }
      }
      image_sources: [
        {
          arch: amd64
          image_reference: "uwcloud/openvpn:0.1"
        }
        {
          arch: armhf
          image_reference: "uwcloud/openvpn:0.1"
        }
        {
          arch: arm64
          image_reference: "uwcloud/openvpn:0.1"
        }
      ]
      metadata: {
        memory_limit_mb: 100
      }
    }
  )
}
Checking job status
This query allows you to check the job status with the job IDs received from the import mutation.
query job_status {
  DM_get_node_service_import_jobs(ids: ["44f68578-52c7-49dd-8c12-ccdd275ef123",
      "ef895fb3-dcbf-491e-a711-2cb3ac165124",
      "4393a8d0-3621-4d37-a9e2-edc2b4c1a125"]) {
    node_service_import_job_id
    state
    logs
    created
    last_modified
    arch
  }
}
The output will show the state (in_progress, ok, failed) and a log of what happened after the import job is done.
Step #2: Configuring it on a device
Adding a container to a device can be done very quickly:
create a network uplink for the container (NAT or CloudLink)
for reliable aggregated uplinks across multiple modems or ethernets you could select CloudLink
attach the container to that uplink
optionally attach a LAN side to that container
since we passed the
dhcpvalue to thelan_configure_networkoption above, an automatically configured dhcp server will be available on the LAN sideyou can connect any device on that LAN port to access the OpenVPN tunnel in the container
Step #3: Configuring your OpenVPN config for the container instance
For example the OpenVPN could look like this:
client
proto udp
explicit-exit-notify
remote server-ip-or-host 1194
dev tun
resolv-retry infinite
nobind
persist-key
persist-tun
remote-cert-tls server
verify-x509-name server_aaaaaxz8 name
auth SHA256
auth-nocache
cipher AES-128-GCM
tls-client
tls-version-min 1.2
tls-cipher TLS-ECDHE-ECDSA-WITH-AES-128-GCM-SHA256
ignore-unknown-option block-outside-dns
setenv opt block-outside-dns # Prevent Windows 10 DNS leak
verb 3
<ca>
...
</ca>
<cert>
...
</cert>
<key>
...
</key>
<tls-crypt>
...
</tls-crypt>
In order to use that configuration file, it needs to be mounted at /vpn/vpn.conf. In order to do so, we need to first convert that file into base64. You can use any tool you find suitable for this, and we recommend this process.
E.g. your config file is stored under client1.ovpn
You can use command line openssl to do the conversion:
openssl base64 -A -in client1.ovpn
The output of this command is a base64 encoded file content. In order to mount this file content in the container, you can use this mutation (requires the node service instance ID of the configured container from the UI):
mutation set_openvpn_conf_client1 {
  DM_update_node_service_instance_config_mounts(
    id: "tp1i814maabb"
    config_mounts: [
      { mount_path: "/vpn/vpn.conf", mode: 256, value_base64: "INSERT THE BASE64 FILE CONTENT HERE" }
    ]
  )
}
Hint
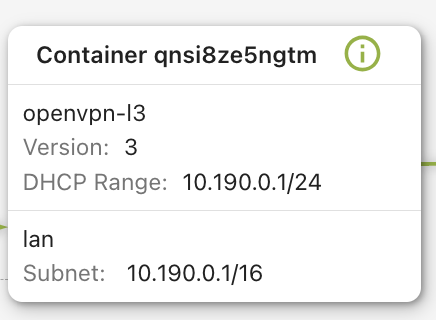
Node service instance ID This is the alpha numeric ID shown on top of the container instance box when a container has been configured for a device:
Using the OpenVPN L3 connection
You can connect your computer or a wireless access point bridged to that LAN port and then you will automatically get an IP address from the DHCP server.
As soon as the container has connected to the OpenVPN server you can surf the internet through that server.
Server setup
Setting this up on the server-side is very simple, e.g. using the following project this can be set up in an arbitrary VM in less than 10 minutes: https://github.com/angristan/openvpn-install